Trost House

Trost House

Sunday, July 28, 2013

Lessons

Until I got going, I didn't realize that I'd done the porch assembly backward: I should have done the brick support piers and lattice before the columns and railings. Now I'm completing them to give them stability before working on those. Live and learn!


Saturday, July 27, 2013

Not a Photogenic Day

Today was all about foundations for the next segments: spacers for the floors to rest on and build wall around on Houses 2 and 3, and more steps preparatory to assembling porches. 

The porch ceilings for Houses 2 and 3 moved along (though still need paint and railings) and the posts and railings for the first main porch are well underway. That means cutting two eens-weensy blue caps for each of the 9 or 10 columns, and gluing them top and bottom.  For the pilot house, I didn't assemble the columns completely first and later regretted it, so at least for House 1, I'm giving that a try.

After the columns are in place,  there's a header that sits longside exposed on top of the columns. That works better in large chunks glued together in advance, so that got done for all three houses today, too. The header is harder to bevel than square material: this is a place where it would have been more sensible to get square rather than accurate lumber. Still, the headers are all cut and glued, so after the columns are capped, this should start to go together and look like something.


Today and tomorrow may be the last days of progress for a few days, as we have company coming for a few days, leaving Wednesday morning.

Friday, July 26, 2013

First Porch Roof Complete; New Wedges Work! Other Basics for Continuing

 Getting ready to assemble the shell of House 2 yesterday, it became clear that there were a few hitches in moving forward on that step. For one, Rube Goldberg called and wanted back his design for the staircase in House 1 so it wouldn't get replicated, and the wiring still needs to be run in the next two houses. So while I'm mulling over a better solution for the staircases (and consulting Michael, of course), I moved ahead with other stuff that will be necessary for the assembly, working on the furniture. Progress and more furniture coming in the mail, as well.

Meanwhile, the front porch ceiling/roof for House 1 is assembled!  The wedges to get the angles right were Michael's inspiration (who else?) and they work fantastically well. The ice porch, sigh, needs some slight modifications as somewhere in the measurements, something got just a bit off--in the small direction, not the big one, of course.


 To get on with the next part of the front porch, more prep work: paining railings (tedious) and the paper cross stitch "canvas" that stands in for the lattice under the porch between the brick columns. About half the railings got done and the columns are now all painted, too. The rest of the railings will have to wait for another day.

It's great to see the completed front porch and see how well it fits on the house. Progress again!

Wednesday, July 24, 2013

Carrying On

 I found a picture of my well-intentioned (though likely invisible int he final project) crown molding after all.

 I got the last of the structural pieces (save the south wall and the sun room) installed, and next comes the porches. That left me with a decision about whether to press on with House 1 or bring Houses 2 and 3 up to the same point. After a lot of dithering (a lot), using the recent experience to keep relative parity among the houses won out. Using the experience of getting internals done before too much external/structural work, it seemed to be time to work on the furnishings and their placement. They won't get glued in until the structural work is all done (including the stairwells), but this let me gather all the pieces.

It requires making all the furniture (shapes), so that occupied most of the day. Meanwhile, I tested the lights in House 1 and discovered that the walls are such that the dining room (the most completely furnished) doesn't show well, given the placement of the walls and lights. Maybe installing one more light in the dining room is in order? Not sure yet and mulling it over. Lesson learned for next houses, though!

Finally, here's the view while I'm mulling what to do next. It's conducive to deep thoughts!

Tuesday, July 23, 2013

Mushroom Factor Multiplies, Three Sides Closed

The west wall finally got closed, after I finished fussing about how far to take the internal finishing stuff. There was some awkwardness around some of the architectural accuracy and, once that got overcome after a few days thought, it was time to move onto the east wall.


THAT was postponed by the mushroom multiplier: first, came additional furniture.


Then came more embellishments for views through windows. 


Ad a plant stand. 


Then, despite my earlier stance, a rug. Okay, multiple rugs (though no pictures of the ones for upstairs and the front room.)

Sadly that chapter also included crown molding in every room not already closed.


Sigh.


 It did get to the point where it was time to start closing the east side, and the adjustments we made are fantastic. It all went together so smoothly. It works!


Monday, July 22, 2013

Still Carried Away

 Once thinking about creating the appearance of furniture and shapes kicked in, I had a hard time drawing the line. It was a ton of fun, though. Older daughter had found and made a grandfather clock kit (SDK Miniatures, again!) and since her house will have one, I went ahead and constructed one for each of the other houses using odds and ends in my stash and the general outline of Susan's as a guide. As it's the shape that matters, I didn't worry about a clock face; our printer here isn't good enough to do really fine work anyway, so there wasn't much point in the aspiration. I'm pretty much giving up on rugs for the same reason, though if I come up with a better  plan than printies, maybe the next two houses can have some.
The gold paint on the couch and chairs doesn't show up too well here; my thinking was that it might reflect the light a bit. We'll see how that turns out. As the next set of furniture comes together, I'll try to get better pictures.


None of that holds a candle to the Rube Goldberg mechanism that became the staircase. If I'd planned ahead better, there could have been a real unit here, instead of the organic-and-messy version I created. It wouldn't have been as fun, though. 

I used porch railings (cut by SDK) and strips of siding (window cutouts) for the stairs, though the main part of the illusion will come from the angle. The siding isn't the right scale or number for the steps, and it shouldn't show anyway. It looked better while I was working on it, though.  

Just before placing it, it became clear that the closet window would look through to daylight without something to create a landing (above the window) and a closet door (directly in front of it). Using bits of wood leftover from the furniture kits from last year (1/64"), both came together.  Not realizing how blurry the photos were (terrible), there isn't one that shows the staircase and walls in place.  This means waiting for the next one to document it better.


Next up, loveseats for the room across from the dining room and then closing up the east and west sides of the house. The final, south, wall plane must wait for sunroom construction, as that must be in place before the south wall slides into the attic plane and gets attached. 

Saturday, July 20, 2013

Getting a Little Carried Away; Furniture Edition (Revised to Add More Photos)

Because these houses will be lighted, the plans from the first have called for some internal furnishings in the dining room and sunroom because those windows are large and not covered. The other rooms, I just figured the curtains would be the line of demarcation. As I get closer to closing up House 1, though, I get more and more worried about what's going to be perceptible from the outside with good lighting inside, even with curtains.

This is a long way of saying that I got totally diverted Saturday to thinking about internal furnishings, or at least shapes that would suggest internal furnishings.

The dining room table and chairs, a fantastic kit by SDK, put together by wonderful daughters, has been in the works for a long time. Because the second floor is already on (for stability and I figured it would be better not to have the furniture in place while the second floor and lighting work was going on because it involves a lot of tilting and tapping), it ended up being easier to get the table and chairs in place by gluing them together first.


The more I thought about the internal lighting and what would and would not be visible from the exterior with the curtains, the more I became convinced that shapes and outlines would be apparent. In a classic mushroom factor, that led to creation of some couches and chairs that will only be seen in silhouette. (I hope)

Having gone that far, I made some plants for the dinning room. (Those wall panels are not on yet; they're just standing in place to see how the plants will look through the windows.)


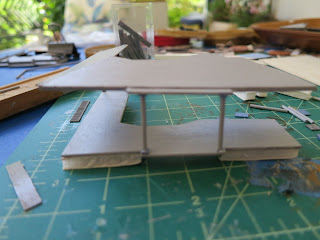
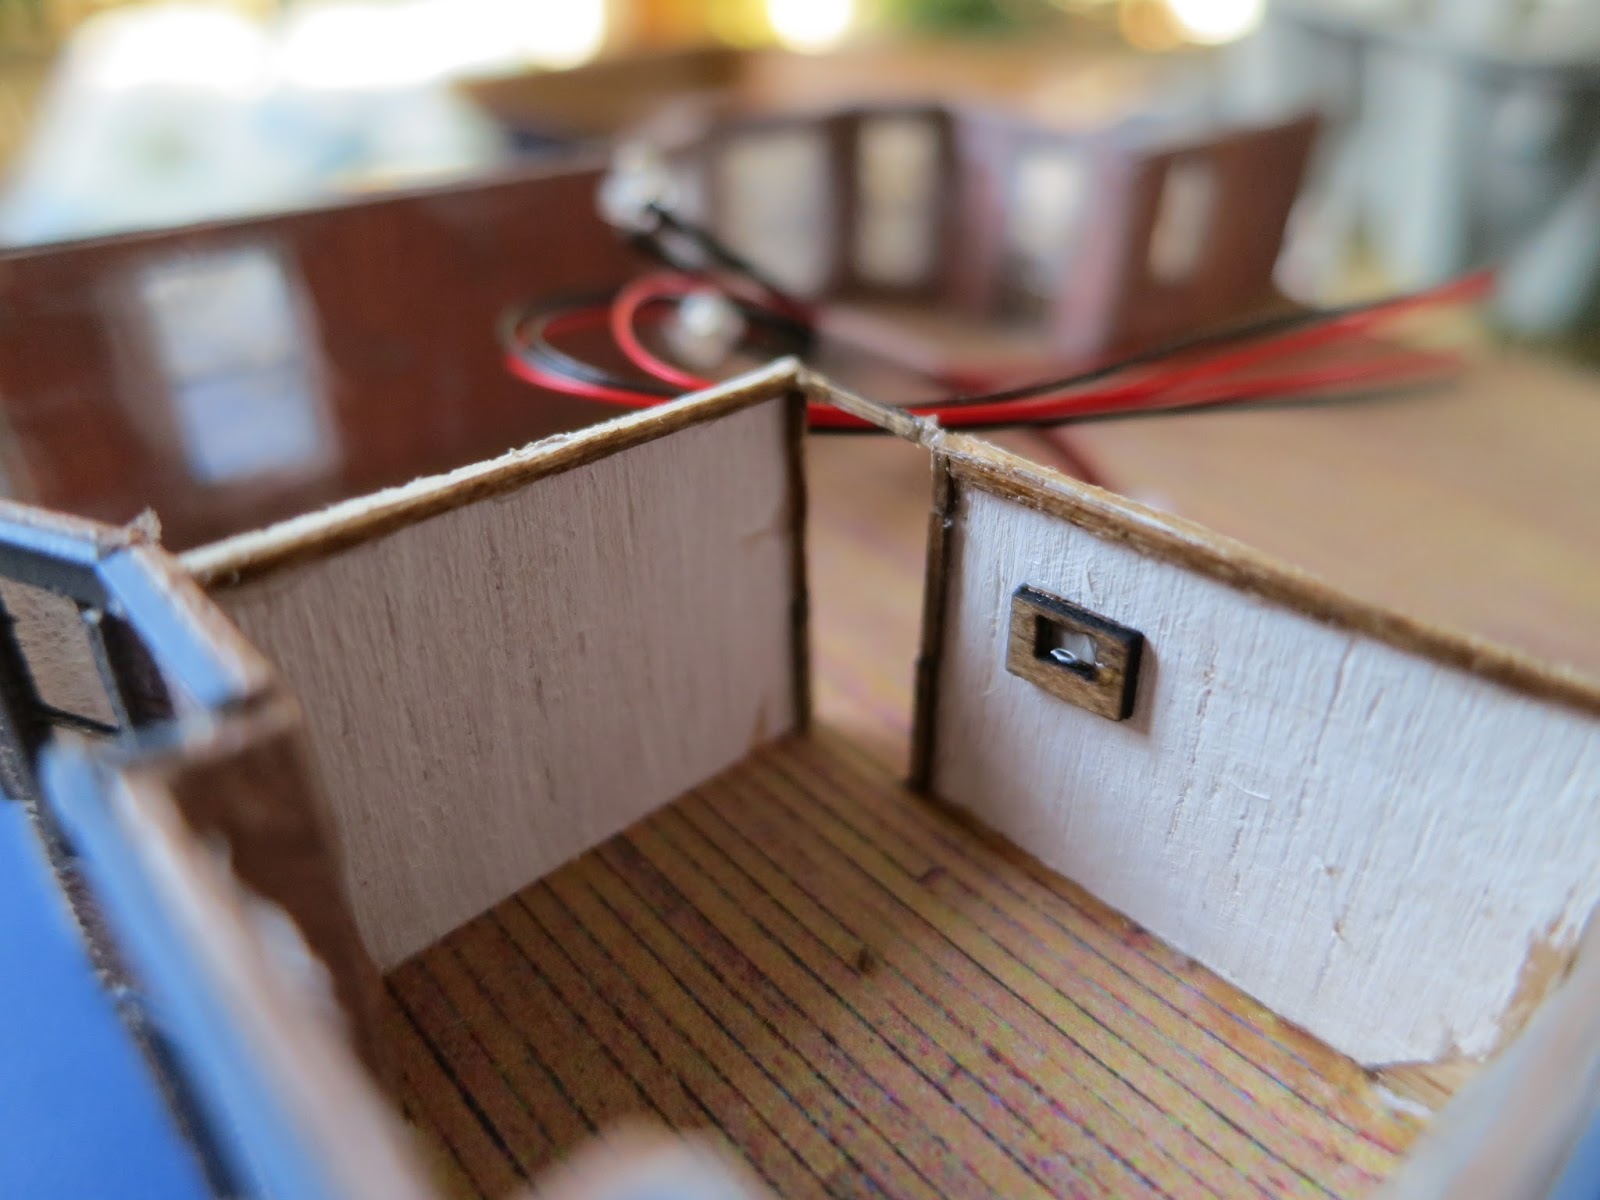
Then, I got to worrying about the visibility of the stairs. That's always been an issue in my mind, because there is a window on the landing of the main stairwell and it's a pretty big window. Templewood Miniatures has a great staircase in one of its structures, one that turns and has a landing, and I'd communicated with them about whether they'd sell those alone, but I never buckled down and did the calculations to figure out the dimensions needed here. Since I don't really need the stairs themselves (I think/hope), I played around with porch railings and leftover bits to suggest a staircase. It's not done yet, but it's coming along and I think it will do the trick given that the main window on the first floor will be under the porch and the landing window is curtained. Fingers crossed. I think some internal walls on the second floor may also be needed. They'd need paint but surely not doors? You can see the mushroom factor here. We'll see what happens next. With the couches and a chair or two, I think some more of the sides can go on soon, unless I get more carried away. We'll see....  


Thursday, July 18, 2013

Finally! House 1 Walls Rising

 It's going together incredibly smoothly, though slowly, since the goal is to avoid the unsightly gaps in the pilot house. Time again ran out for me today, what with one work thing after another demanding time. Still, it feels and looks good!


Wednesday, July 17, 2013

All Windows Done!

Today brought another milestone: all three houses have all their windows, frames, glass and curtains (well, all windows except dining room, which isn't slated to get any). Yay! The window stuff got tedious and I'm so, so glad it's done.

Michael's system of bending on the round to counteract the warping worked really well, but there were a few pieces needing to be pressed afterward as there was an ever-so-slight overcorrection.Those pieces spent the day under our massive dictionary and now look totally flat, square and true. So, finally, probably, tomorrow for construction.

Since nothing today was photogenic or else was totally repetitive, I took a picture of the inside of one of the roofs: it's a pretty shape, isn't it?

Tuesday, July 16, 2013

Three Complete Roofs!

On the verge of (finally) assembling House 1, it became clear that some of the pieces were just a little warped, enough they wouldn't glue well. Michael came up with a solution as I'd already pressed them without effect. This probably won't be necessary for the other houses because the painting technique I adopted by the later houses really reduced the warping. Will see as we go, but especially the skinny bays are hard to get in just the right place, and any deviation from square really shows, even after the glue dries. The angles mean that gluing in place can be a trick, too. Hoping this will work. They weren't a lot warped, just enough, and so we're hoping this will cure it.

Foiled (again) in the aspiration to assemble a house, I went back to finishing other things. I finished the three roofs, though when I looked at this picture, I noticed there's a cap missing from one of the valleys in House 2, so tomorrow that will be corrected.

I also worked more on finishing putting in the windows and adding window frames for House 3. That's another task that's getting old with as many as there are in this project, and it's coming along, though slowly. One more side to go (a many-window side, of course) and that job will be done. Throughout working on that, I thought warm and grateful thoughts to Susan at SDK for all the custom laser cutting. In the early days, before custom laser cutting by someone of her expertise, I basically kit-bashed standard plastic windows, for each and every window. That wasn't fun, and the results weren't nearly as nice as her fantastic window pieces, inserts for the windows themselves out of 1/64" wood and window frames out of bristol board. They are really wonderful and the fit is great. What a wonderful advance!


Monday, July 15, 2013

Bandboard, Brick, Shingles

The easiest bit to "trim up": everything to
the left has porch covering it--no brick required!
I discovered yesterday that the thing that had deterred me from getting started on dressing the sides with the remaining items is that I really don't like applying the brick.  (emphasis on really)

The bandboard and the highlighting trim that goes just above it both actually go on quickly and pleasingly. It's only the brick that's a total pain to work with. Given that discovery, I think I'll put t applying he bandboard and trim to the other two houses as one of the small tasks that goes fairly quickly while I'm between stuff that has to be done to keep the stuff they pay me for moving along.
House 1 all done but for the brick.... and that's coming along. 
I completed all of the trim on House 1, and was just shy of finishing the brick on that house (so close!!) when the available time turned out to be less than the time remaining to complete the job. That was frustrating. Can you hear me saying not-nice words? I said them.

Interestingly, even though I knew that trimming the other two houses would go well, I couldn't bring myself to work on that when the final trimming of House 1 wasn't quite done. So today, since I really didn't want to work on brick, I finished shingling House 3. This means I can assemble another roof soon as a quick task--and one is fun, fast and turns out so well. Ahhh!

Saturday, July 13, 2013

First Dry Fit

Though there's a long way to go before I start gluing, today brought the first dry fit. I think this new approach is going to work (yay!!!), though we discovered a calculation error in one place that's going to require some retrofitting/adaptation. That isn't a big setback, and it will be relatively easily remedied. Overall, seeing it come together felt like real progress!

Since I had the time and was trying an audiobook this afternoon, I also made headway on the shingling for House 3. It's coming along nicely and the end of shingling is finally in sight. House 3 still needs windows on two sides (the two sides with the most windows, of course) to be caught up, but it's not lagging so much now as it was, which feels good, too.

Otherwise, before starting to build the walls around the base, there is still bandboard and brick to apply, and decisions to make about which furniture to put where. Daughters have contributed SDK kit-built dining room furniture and some couches, and of course I have wonderful porch swings for each house.... and now am fretting about the upstairs. There's a balance here between avoiding (too much more) mission creep and doing it right. Sigh. Not sure where I'll come down on that, though it's possible that evocative shapes might work, without detailed pieces. There's enough to do in other directions that doesn't have to be resolved now and the decision can "rest" a bit.

Overall, a great day.
House 1 taped together for dry fit; pilot house in background. 


Friday, July 12, 2013

Multiple Fronts

Lighting, structure, window/trim and shingles all advanced over the past two days. With Michael's help, we think we have a plan for structural stability and lighting.  Will try actually building on it this weekend. 


While I decided against a full-blown interior model since the house will be closed and it's the structure I"m interested in, we have had a bit of mission creep since the dining room window (to match the original) won't have curtains. Since all others will be at least slightly obscured, I didn't worry about walls. The dining room, though... and since I had a scrap that would do it, I hung a painting while I was at it today.


Meanwhile, the package of shingles arrived, and with a deep breath, I started in on the roof for House 3, so it stays more or less up to the state of the others. My, I'll be glad when the shingling is all done! Almost as glad as when all the windows and trim are complete: two walls down on House 3, two to go.